My first CapCut video took me four hours. It was thirty seconds long. The audio was out of sync, the text was in the wrong place for half of it, and I exported it in the wrong aspect ratio so everything had black bars on the sides.
Four hours. Thirty seconds. Black bars.
I’m telling you this because if you’re starting out and feeling like it’s more confusing than it should be — that’s normal. CapCut has a learning curve that nobody really warns you about. It’s not steep, but it’s there.
This guide is everything I picked up over weeks of just using the app and making mistakes. Mobile, PC, beginner basics, the stuff worth knowing and the stuff that just wastes your time. All of it, in the order that actually makes sense to learn it.
First — What Is CapCut and Should You Even Use It?
CapCut is a free video editor. ByteDance made it — same company as TikTok — and it came out around 2020. Since then it’s kind of taken over as the go-to editor for short-form content.
Here’s why people actually stick with it though, beyond just being free:
It doesn’t feel stripped down. A lot of free apps give you just enough to be frustrating — like they’re constantly reminding you that the good stuff costs money. CapCut isn’t really like that. The free version has a proper timeline, real audio tools, color grading, effects, AI features. Stuff that other apps charge monthly fees for.
Does it have a paid tier? Yeah. Is it necessary for most people reading a beginner guide? Not even close.
It runs on Android, iPhone, and Windows PC. One account syncs across all of them, which is more convenient than it sounds when you start a project on your phone and want to finish it on your laptop.
Okay. That’s enough background. Let’s get into the actual stuff.
Understanding the Interface — Do This Before Anything Else
I skipped this part when I started and paid for it. Just spend five minutes looking around before you open your first project. It saves a lot of confused fumbling later.
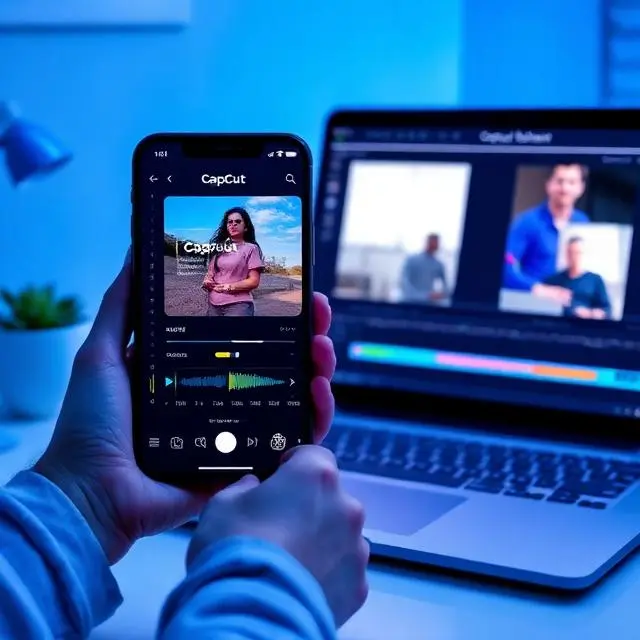
On Mobile
Open the app. You’ll see a home screen with your past projects in a grid and a plus button sitting in the middle to start something new. There’s a Templates tab at the bottom too — ignore that for now, we’ll come back to it.
Once you’re inside a project, here’s how the screen is divided:
Top half — preview window. This is your video playing back. There’s a little scrubber bar you drag to move through the timeline.
Middle — the timeline. Your clips sit here as horizontal colored bars. The main video track is the thick one. As you add music, text, and effects, their bars appear below it.
Bottom — the toolbar. This is context-sensitive, meaning it changes based on what you’ve tapped. It sounds confusing in description but in practice it clicks pretty fast.
On PC
More going on here because there’s more screen to fill.
Left panel — your imported media files live here. Treat it like a folder of everything you’re using in the project.
Center — preview window, same as mobile, just bigger.
Bottom — the timeline, but with multiple tracks visible at once. Video on one track, music on another, sound effects on a third, text on a fourth. Way easier to manage complex edits here than trying to do it on a small phone screen.
Right panel — properties for whatever you’ve selected. Position, opacity, speed, color settings — all here.
Your First Project — Just Start, Don’t Overthink It
Seriously. Grab three random clips from your camera roll and just start. You’re not making anything for an audience right now, you’re learning where the buttons are.
On mobile:
- Tap the + on the home screen
- Pick two or three clips from your gallery — doesn’t matter what they are
- Tap Add in the corner
- They load into the timeline in the order you selected them
You’re editing. That’s genuinely all it takes to be inside a project.
On PC:
- Click New Project from the home screen
- Click Import and choose your files — or just drag them from File Explorer straight into the left panel
- Drag clips from the panel down into the timeline
Same result, different input method.
CapCut Mobile — The Tools You’ll Actually Use Every Day
Not going to list every feature. Just the ones that come up constantly.
Trimming
Tap a clip in the timeline. White handles appear at both ends. Drag the left one to cut from the beginning. Drag the right one to cut from the end.
You’ll do this more than anything else in CapCut. Get comfortable with it early.
Splitting
This one took me longer to figure out than it should have.
Move the white vertical playhead line to the exact frame where you want to make a cut. Tap the clip. Hit Split in the bottom toolbar. One clip becomes two separate pieces.
This is how you remove the middle of a clip — split at the start of the section you want gone, split again at the end of it, then delete what’s between.
Music
Tap the empty space in the timeline below your clips — not on a clip itself. The toolbar at the bottom should show an Audio option. Tap it.
From here you can browse CapCut’s built-in music library (bigger than you’d expect), use your own audio files saved on your phone, or even extract audio from another video in your gallery.
Music appears as its own separate bar in the timeline, usually in green. Trim it the same way you trim video clips.
Text
Tap Text in the bottom toolbar, then Add text. Type what you want. Pick a font, pick a color, resize by pinching with two fingers, drag it wherever you want on the preview screen.
The text also shows up as its own bar in the timeline. Drag the ends of that bar to control exactly when it appears and when it disappears.
Transitions
See the small white square icon sitting between two clips in the timeline? Tap it. A menu pops up with a bunch of transition options — dissolves, wipes, zooms, all sorts.
Honest opinion: use these sparingly. A plain cut — no transition at all — is cleaner than a dramatic zoom wipe in most situations. Save transitions for moments that actually call for something visual.
The Features I Didn’t Expect to Actually Like
Auto captions — CapCut transcribes your video’s speech and generates captions automatically. They need some corrections but it’s dramatically faster than typing everything yourself.
Background removal — Shockingly good for a free mobile app, at least for solo shots with a reasonably simple background. Not perfect but usable.
Speed curves — This one genuinely changed how I approach action clips. Instead of making a whole clip faster or slower, you control speed at specific moments within the clip. Those smooth slow-motion ramps you see everywhere on TikTok? Speed curves.
Stabilization — If a clip is shaky, tap it, go to Edit, find stabilize. Use this before you do any other editing on that clip. Works well.
CapCut PC — What Changes and Why It Matters
I used mobile only for a long time. Moving to PC felt like going from a studio apartment to a house — same general idea, just a lot more room to work.
Getting It Set Up
Go to capcut.com. Download the Windows version. Install it like any normal program. Sign in with your account and your mobile projects show up immediately.
That’s it. There’s no complicated setup.
What’s Actually Different on Desktop
The multi-track timeline is the big one. On mobile everything sort of shares limited space. On PC you can genuinely layer things — main video on one track, a secondary clip on another, background music on an audio track, sound effects on a different audio track, multiple text elements each on their own layer.
For anything more involved than a basic clip edit, this is a game changer.
The color grading tools are also more accessible on PC. You can see the controls clearly, adjust curves properly, and apply a consistent look across multiple clips without squinting at a small screen.
Keyboard Shortcuts Worth Learning
Once you know these, going back to doing everything by mouse feels slow:
- Ctrl+B — Split clip at the playhead
- Ctrl+Z — Undo (use constantly)
- Spacebar — Play and pause
- Ctrl+S — Save
- Scroll wheel on timeline — Zoom in and out
Exporting From PC
Hit Export in the top right when you’re done.
What actually matters in the export settings:
- Resolution — 1080p for almost everything. Only do 4K if your footage is actually 4K.
- Frame rate — Match what you filmed in. Usually 30fps.
- Format — MP4. Universal. Works everywhere.
- Bitrate — Default CapCut setting is fine for social media uploads.
CapCut Guidelines — Things That Made a Noticeable Difference
On footage quality: No filter fixes genuinely dark or blurry footage. Work with the best clips you have. Good lighting when shooting beats anything you can do in post.
Stabilize shaky clips before doing any other editing on them. Everything after looks cleaner.
On audio: This is the one beginners mess up most. Viewers tolerate slightly rough video. They don’t tolerate unbalanced or distracting audio. Keep background music at a level where speech is still clearly audible. Use CapCut’s volume normalizer to keep levels consistent across clips.
Always do a final playback with headphones before exporting. You’ll catch things you missed with speakers.
On aspect ratio: Set this at the very start of your project. TikTok and Instagram Reels — 9:16 vertical. YouTube standard — 16:9 horizontal. YouTube Shorts — back to 9:16.
Setting this wrong after you’ve done all your editing means redoing your text positions and crop framing. Ask me how I know.
About CapCut PDF Guides and Guidebooks
People search for a CapCut PDF guide or CapCut guidebook pretty often. There’s no official one from CapCut themselves — at least nothing comprehensive that covers the whole app.
What I’d actually suggest: save this page or use your browser’s print function to save it as a PDF. Select “Save as PDF” instead of a printer destination and you’ve got a personal offline reference that doesn’t need internet to access.
CapCut’s own YouTube channel also has tutorial videos for specific features. Worth checking alongside any written guide, especially for things that are easier to see than read.
Mistakes I Made That I See Everyone Make
Too many effects. This was me in the first week. Every clip had a filter, every transition was dramatic, there was text flying everywhere. It looked chaotic. One or two good choices used well beats five things competing for attention.
Completely ignoring audio. My first few videos looked okay but the music was way too loud and drowned out everything else. People clicked off immediately. Audio matters more than most beginners give it credit for.
Not watching the full video before exporting. The timeline view tricks you into thinking you’ve caught everything. You haven’t. Always do a complete playback before you hit export.
Wrong aspect ratio after finishing the edit. Everything shifts. Text lands off screen. It’s a mess. Set it first, always.
Transitions between every single clip. Doesn’t make the video feel more dynamic. Just makes it feel busy and hard to watch.
Trusting autosave completely. CapCut autosaves but the habit of manually hitting save on PC regularly is worth building. Crashed once and lost twenty minutes of work because I didn’t.
Things That Actually Improved My Editing
Cut on the beat. Syncing cuts to the rhythm of background music makes videos feel tighter and more polished in a way that viewers feel even if they can’t explain it. Try it even on one video and you’ll immediately see the difference.
Disassemble templates. Find a template whose style you like. Open it. Look at the timeline, see how they structured the cuts, what effects they used, how the timing works. This teaches you more about editing technique than most tutorial videos do.
Keyframes. Most beginners never touch these and they’re missing out. Keyframes let you animate anything — text sliding in, elements growing or shrinking, opacity fading. Tap the diamond icon when you have something selected and start experimenting.
Cut more than you think you should. Almost every first edit runs too long. If a clip isn’t clearly adding something, just cut it. Shorter videos hold attention better and are genuinely easier to make look polished.
One consistent color grade. Pick a look and apply it to all your clips. Jumping between warm and cold tones in one video just looks like inconsistency, not style.
Questions I See Asked Constantly
Is CapCut actually free or does it push you toward paying? The free version is genuinely usable — not a stripped demo. There’s a Pro subscription for some newer AI features and premium content, but you won’t hit a wall starting out. Most things beginners actually need are free.
Does it put a watermark on your videos? Standard exports don’t. Some specific premium templates or effects add one, but most free features export clean. Check before using a template if this matters to you.
Can I use CapCut’s music on YouTube without issues? Depends on the track. The music is licensed for use inside CapCut but that doesn’t automatically clear you for YouTube monetization. Check the license on each track if you’re running ads on a video.
Is the PC version basically the same as mobile? Same core tools, same account, different interface. PC has a proper multi-track timeline and more screen space which genuinely changes what’s practical to edit. Mobile is faster for quick edits, PC is better for anything complex.
Is it safe to download? From capcut.com, the Google Play Store, or the Apple App Store — yes. From random third-party sites — no. Don’t do that.
Do I need a good computer to run it? Not really. Standard 1080p editing runs fine on most modern laptops. Only heavy 4K projects with lots of effects will stress older machines.
Where to Go From Here
CapCut isn’t hard. It just takes a few hours of actual use before it starts feeling natural.
First project — just trim clips and add music. That’s the whole goal. Get comfortable with the timeline before you think about effects or anything advanced.
Second project — try adding text and a transition or two. See how they work.
By your fifth or sixth edit you’ll know where everything is without thinking about it. That’s when it gets genuinely fun.
The early videos won’t be great. That’s fine. That’s how it’s supposed to go. Every person whose edits you admire started with stuff that wasn’t very good either. The only way through it is to keep making them.
Visit ApkGuide for more honest app guides, safe downloads, and beginner tutorials — written from real experience, not generated from a template.